Unlock the Sweet Secret: Mastering and Storing Your Poured Fondant Icing Recipe
Imagine serving elegant petit fours, perfectly glazed cookies, or a stunning Bundt cake, all adorned with a smooth, sweet, and slightly firm icing that melts deliciously in the mouth. This is the magic of poured fondant icing – a confectionary staple that's surprisingly accessible for the home baker. Often confused with its dough-like cousin, rolled fondant, poured fondant is a different beast entirely: a pourable glaze designed to deliver a delicate, sugary sheen to your favorite treats. But what if you could not only master this delightful icing but also prepare it in advance, ensuring fresh batches are always on hand? Welcome to the ultimate guide on your
poured fondant icing recipe, covering everything from its creation and application to expert storage tips that keep it fresh for weeks, even months.
The Versatility and Allure of Poured Fondant Icing
Poured fondant icing is a true kitchen chameleon, capable of transforming simple baked goods into professional-looking delights. Unlike heavy buttercreams, it forms a thin, crisp shell that seals in moisture and adds a refined touch. Its applications are broad and beautiful:
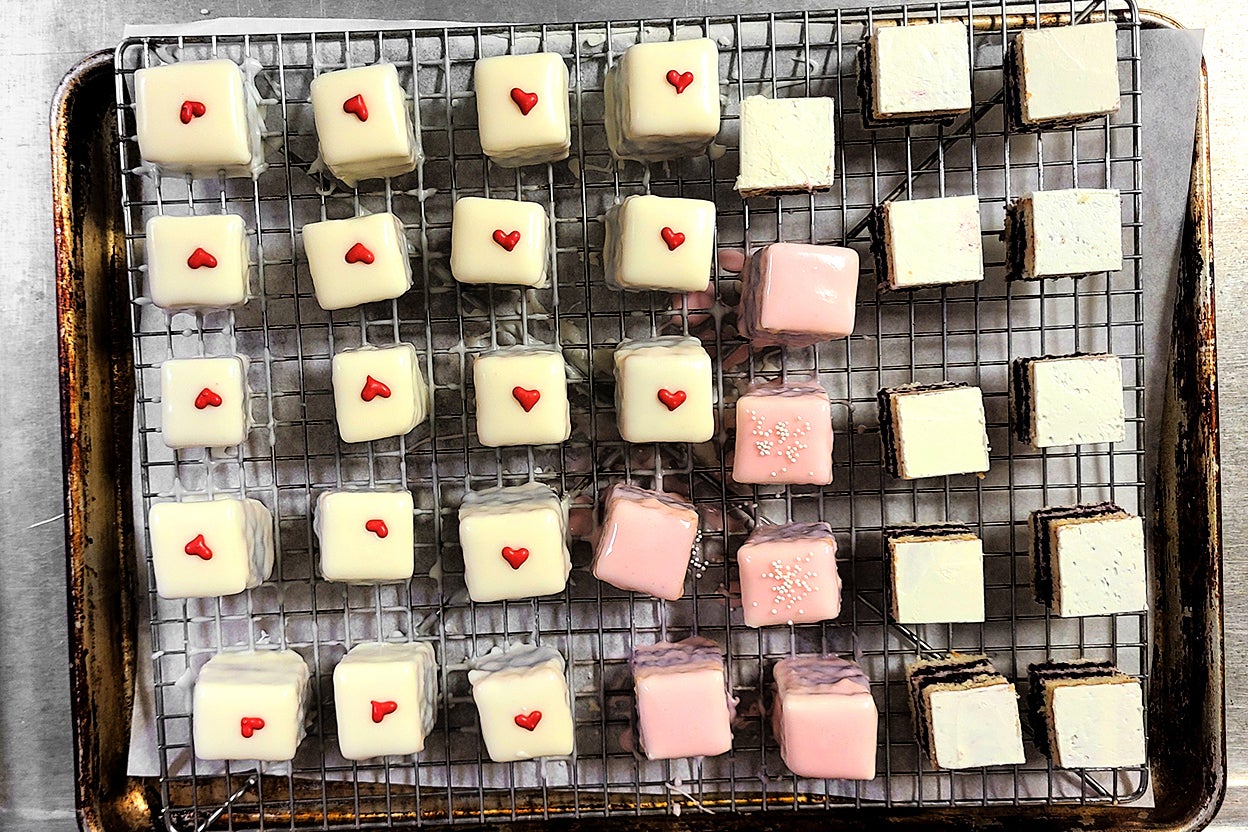
- Petit Fours: The classic pairing. Poured fondant provides that signature smooth, slightly opaque finish that makes these miniature cakes irresistible.
- Cookies: Elevate sugar cookies with a delicate, non-crumbly glaze that takes food coloring beautifully.
- Cupcakes & Cakes: Drizzle over cupcakes or use as a sophisticated glaze for pound cakes, Bundt cakes, or snack cakes for a contemporary look.
- Doughnuts & Pastries: A perfect glaze for homemade doughnuts, napoleons, or even sweet breads, offering a delightful sweetness without being overly rich.
One of the keys to success with any
poured fondant icing recipe lies in achieving the perfect consistency. You want an icing that's smooth, fluid enough to coat evenly, but thick enough to cling without being translucent. A great test is to lift a spoon of icing and let it fall back into the bowl; it should create flat ribbons that slowly disappear back into the surface. If it's too thin, it won't coat; too thick, and it will be lumpy and difficult to work with.
Crafting Your Own Poured Fondant Icing Recipe: Simplicity for the Home Baker
While "true fondant" – the kind you find in the center of a peppermint patty, requiring precise temperature control and crystallization – is a confectioner's art, the home baker's poured fondant is far simpler and just as delicious for glazing purposes. This accessible version typically relies on powdered sugar, making it a quick and easy solution.
It's a wonderful compromise for those who desire the elegance of fondant without the technical challenges of traditional candy making. The powdered sugar base ensures a smooth texture and a delightful sweetness that complements a wide range of baked goods. For a deeper dive into this accessible method, you might find
Powdered Sugar Fondant: Home Baker's Easy Glaze Solution incredibly helpful. It tastes fantastic, is incredibly easy to prepare, and even easier to use.
The basic components usually include:
- Powdered Sugar: The base and primary sweetener.
- Liquid: Water, milk, or even fruit juice for flavor variations.
- Flavoring: Vanilla extract is common, but almond, lemon, or other extracts can be used.
- Optional: A touch of corn syrup or light Karo syrup can add shine and prevent cracking.
Mixing these ingredients correctly yields a velvety smooth icing, ready for your creative endeavors.
Mastering Application Techniques: Glazing Without Waste
Once your poured fondant icing is perfectly consistent, the next step is application. There are several effective methods that minimize waste and ensure a beautiful finish. Mastering these techniques will not only make your baking process more efficient but also more enjoyable. If you're looking to refine your glazing skills, consider exploring
Master Poured Fondant: Glaze Desserts Without Wasting Icing for additional tips.
Pouring Over a Wire Rack
This is perhaps the most popular and efficient method, especially for items like petit fours or cookies.
- Set Up: Place your cooled treats (petit fours, cookies, etc.) on a wire cooling rack, leaving a few inches between each item.
- Catch the Drippings: Position the wire rack over a large bowl, a sheet pan lined with parchment paper, or a silicone baking mat (Silpat). This will catch all the excess icing.
- Pour and Coat: Using a large kitchen spoon or a small ladle, slowly pour the icing over each treat, ensuring full coverage. The excess will drip into your collection bowl/sheet.
- Reuse: The captured icing can easily be scraped or poured back into your main icing bowl for reuse, significantly reducing waste.
The Dipping Method
For smaller, flat items like cookies or mini cakes, dipping can be quicker and offer a very uniform coating.
- Prepare the Icing: Ensure your icing is in a wide, shallow bowl, making it easy to dip.
- Dip and Drain: Carefully dip the top surface of your treat into the icing. Lift it out, allowing any excess to drip back into the bowl.
- Set: Place the dipped item onto a wire rack to allow the icing to set.
Both methods provide excellent results, but the pouring method offers more control over the amount of icing applied and is ideal for items with intricate shapes or multiple layers.
Storing Poured Fondant: Freshness That Lasts for Weeks or Months
One of the unsung heroes of the
poured fondant icing recipe is its impressive shelf life. Unlike many other icings that demand immediate use, poured fondant can be prepared well in advance, offering unparalleled convenience for busy bakers or those planning larger events. Knowing how to store it correctly ensures you always have a batch ready for spontaneous baking sessions or last-minute dessert emergencies.
Short-Term Storage: Room Temperature & Refrigeration
For quick access or short-term planning, poured fondant holds up beautifully:
- Room Temperature: If you plan to use it within 2-3 days, your poured fondant can be kept at room temperature. The trick to preventing a crust from forming on the surface is to place a few drops of water directly onto the surface of the icing in the bowl, then cover it tightly with plastic wrap, ensuring the wrap touches the surface of the icing to create an airtight seal.
- Refrigeration: For up to a week, store your fondant in the refrigerator. Again, add a few drops of water to the surface and cover tightly with plastic wrap, ensuring it's in direct contact with the icing. This prevents drying out and the formation of a hard layer.
Before using refrigerated fondant, allow it to come to room temperature. You might need to stir it vigorously or even gently warm it over a double boiler or in short bursts in the microwave (on low power) to restore its pourable consistency. Always pour off any surface water before stirring and reheating.
Long-Term Solutions: Freezing for Months
For ultimate convenience and to extend its life significantly, poured fondant can be frozen:
- Freezing: Poured fondant icing can be frozen for up to 3 months. Transfer the icing to an airtight freezer-safe container. While adding water to the surface is an option, ensuring the container is truly airtight will generally suffice to prevent freezer burn.
- Thawing and Rejuvenating: When ready to use, transfer the frozen fondant to the refrigerator overnight to thaw, or leave it at room temperature for several hours. Once thawed, you'll likely find it very thick or even somewhat lumpy. Bring it to room temperature completely. Stir it well, and if necessary, gently warm it over a double boiler or in the microwave on a very low setting, stirring frequently, until it returns to its smooth, pourable consistency. If it's still too thick, add a tiny amount of water or corn syrup, a few drops at a time, until the desired consistency is achieved. If it somehow becomes too thin, a spoonful of powdered sugar can help thicken it up.
Proper storage techniques mean you can always have this versatile icing on hand, ready to elevate your desserts with minimal fuss.
Conclusion: Your Sweet Success Story
The
poured fondant icing recipe is a powerful tool in any baker's arsenal. It's an elegant, versatile, and surprisingly easy way to add a professional touch to everything from dainty petit fours to robust Bundt cakes. By understanding its perfect consistency, mastering simple application techniques, and, crucially, knowing how to store it effectively, you empower yourself to bake more efficiently and creatively. Whether you're preparing for a special occasion or simply want to have delicious glazes ready for everyday treats, poured fondant is your secret weapon, promising weeks or even months of sweet success. So go ahead, whip up a batch, and enjoy the lasting freshness and endless possibilities!